How to use TFS source control in Android Studio in 2024

Team Foundation Server (TFS) is a robust platform for version control, project management, and collaboration, typically used within the Microsoft ecosystem. Despite its widespread adoption in Microsoft-centric projects, TFS's utilization in the realm of Android development is less common compared to other version control tools such as Git. In fact, setting up TFS in Android Studio can be quite tricky, as there is no built-in support for it. However, Microsoft has developed a plugin that allows us developers to seamlessly use TFS in the IDE. In this guide, I'll walk you through the process of using this plugin to effectively integrate TFS into your Android development workflow.
Let's get to it!
Steps
1. Install the plugin
-
Open Android Studio and go to File > Settings > Plugins. You can also open the settings with the shortcut Ctrl + Alt + S on Windows or ⌘ + , on Mac.
-
Click on the Marketplace tab and search for "Azure DevOps". You should see something like the following:
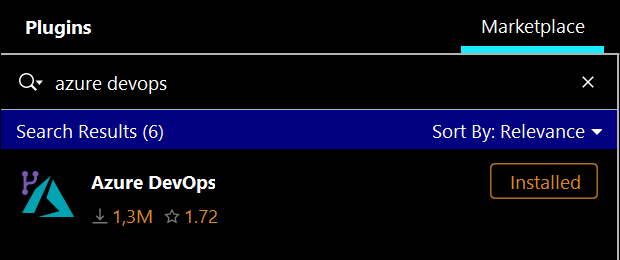
Click on "Install". Once the installation process is finished, restart the IDE if Android Studio asks you to do so.
2. Download the classic TF command-line client
-
Go to the releases page of the Team Explorer Everywhere repository on GitHub and download the
.zipfile that starts withTEE-CLC-from the latest release.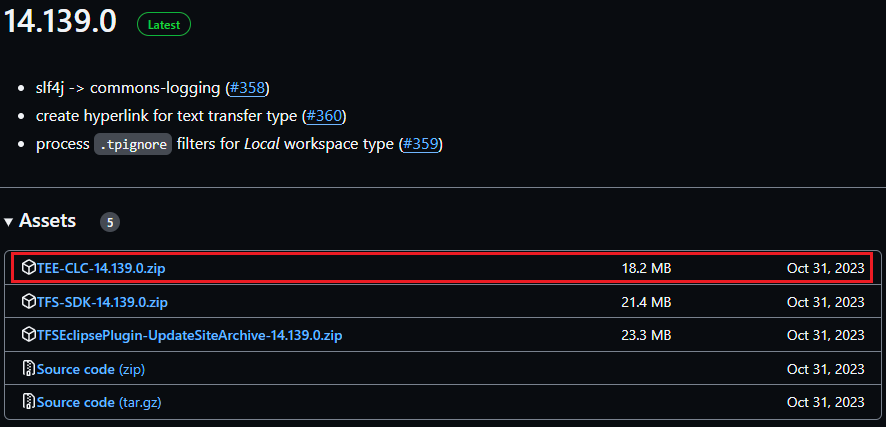
-
Extract the
.zipfile you just downloaded. -
Go to File > Settings > Version Control > TFVC. In the "Classic TF command-line client" option, click on the folder icon and browse to the folder you just extracted. Select the
tf.cmdfile and click OK.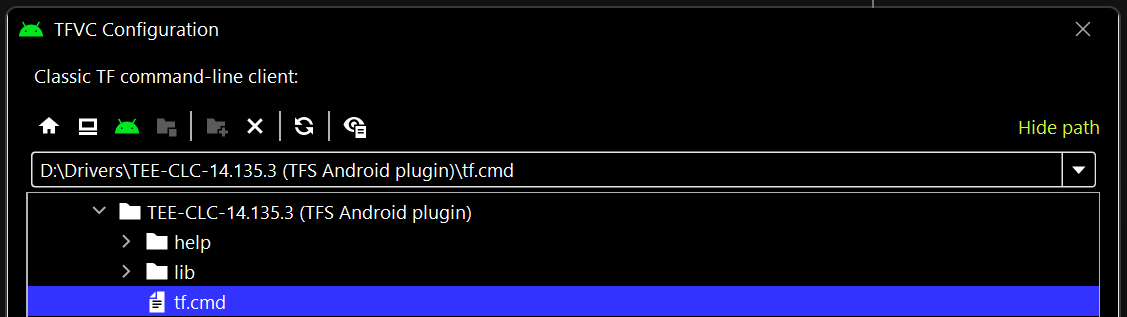
-
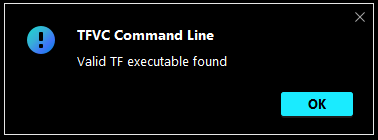
Click the "Test" button. If everything went well (it should), you should see a dialog saying "Valid TF executable found".
3. Connecting to TFS
-
Go to VCS > Get from Version Control. You'll be prompted with a dialog in which you'll select "Azure DevOps TFVC" as the version control.

Click "Clone".
-
You'll see another dialog with a "Server URL" option. Enter the URL of the server where your repository is located, and then click "Connect" when you are finished.
-
Now you should see something like this:
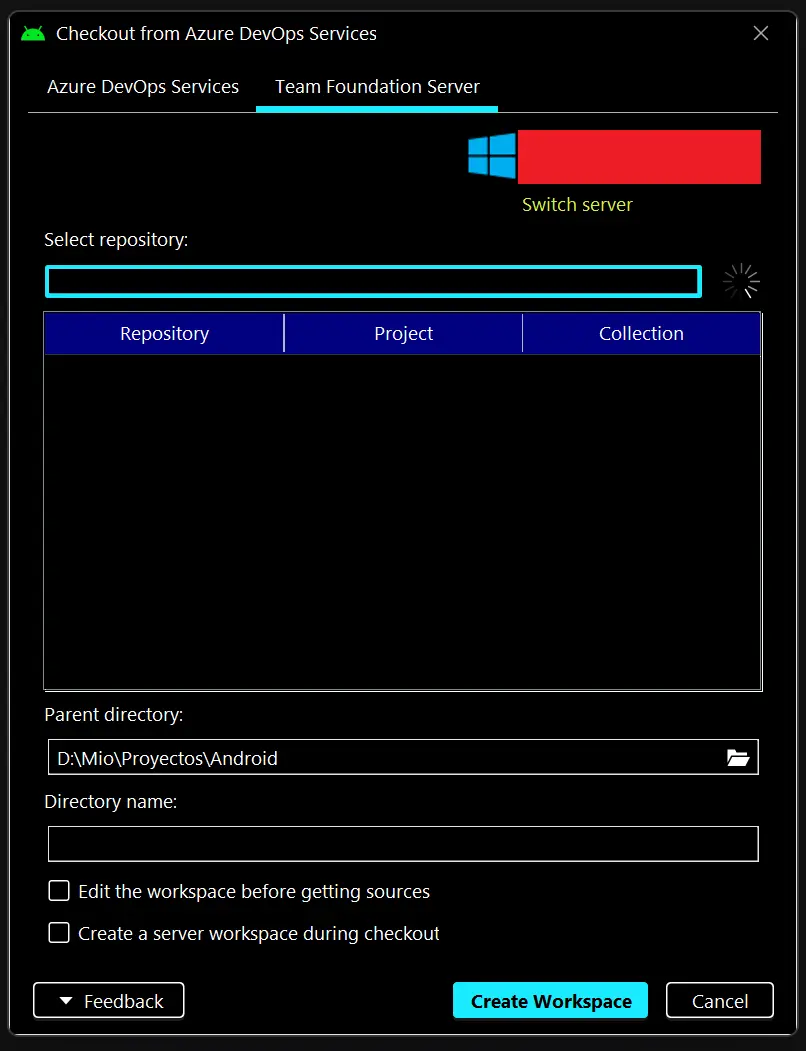
Instead of the red rectangle, you should see the URL that you specified in the previous step, along with all the repositories located in that URL. Select the one you want to clone and specify the "Directory name".
EXTREMELY IMPORTANT: Make sure that the "Directory name" you enter is NOT already created. Otherwise, you'll end up in a vicious loop trying to create a project in an existing folder, which will cause the wizard to simply close without any error prompt when you click "Create Workspace".
You can leave the checkboxes unchecked if you don't need to edit the workspace before getting sources or to create a server workspace during checkout. When you are ready, click "Create Workspace".
-
Go to File > Open... and select the Android project from the cloned folder.
Congrats! You just have cloned your repository from your TFS server.
Perform version control actions
Update project
In the lower toolbar of Android Studio (the position may change depending on your IDE version and layout configuration), you'll now see a TFVC option. Click on it and go to the "Upcoming" tab. There you'll see the history of the project's checkins, as well as several icons to perform various actions. To update the project, click the blue arrow to update your local project, or the refresh icon to update your local project's checkin history.
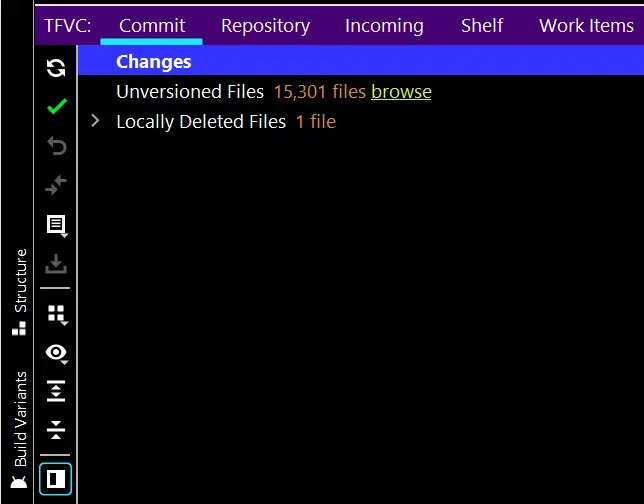
Checkin
Once you have some changes ready to checkin, click on the green tick shown in the "Commit" tab, as shown in the image below.
Once you click it, you'll see the usual Android Studio dialog showing the diff with the changes and the text box to enter the checkin message. Click the "Checkin" button when you are ready to perform the action. You should see the checkin you have just performed in the "Repository" tab. If not, click the refresh icon.
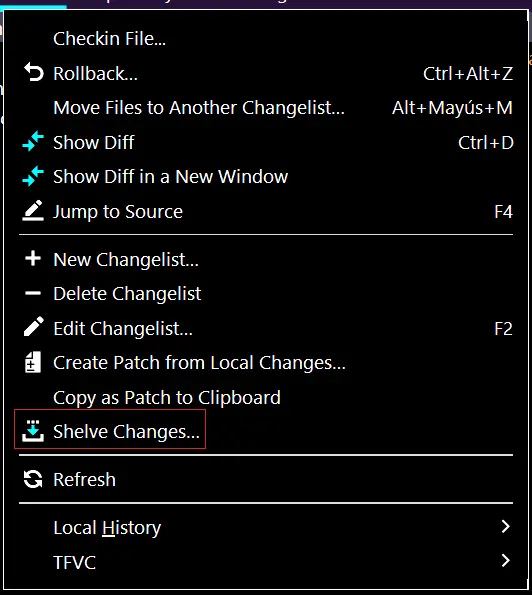
Shelf
Shelving changes is pretty much the same as in Git. In the "Commit" tab, right-click on "Changes" and select "Shelve Changes".
You'll be prompted with the same dialog as when you do a checkin. Once the IDE has finished shelving the changes, you'll see them in the "Shelf" tab with the corresponding description. Right click on it and select "Unshelve Changes" to apply them again.